Stay informed by signing up to receive our email newsletter

|
Tuesday 13th February 2018 at 13:15 By Rob |
 |
If so, read on more to discover how to use aperture with a DSLR camera.

We find many people will buy a DSLR camera, eg something like a Canon, Nikon or Sony, but they never actually learn how to use it. Using a DSLR camera on fully automatic mode doesn't give you that many advantages over just using a camera phone. However, learning how to set the aperture will enable you to take much better product photography.
We passionately believe that good photography makes the difference between a beautiful looking website, and a terrible one. We also believe that an affordable eCommerce website can look expensive with decent photography. Knowing how to control the aperture on your camera, and, where necessary blur out the background is one of many things you can do to achieve better product photography.
1) What is aperture and why should I care?
2) f numbers (f stops)
3) Good vs bad examples
4) How to set aperture on your DSLR camera
5) Further reading

Simply put, controlling the aperture allows you to add an extra dimension to a photograph by blurring the background.
The aperture is the size of the hole of light your camera is exposed to when your camera takes a photograph. The larger the aperture, the bigger the hole when your camera takes a photograph.
The larger the aperture, the more blurry the background of the picture will be.
Aperture is measured in an "f" number (or "f stop").
Low f number
High f number
What f numbers can I take with my camera?
On a DSLR camera, the range of apertures you can use is governed by the lens, rather than the camera itself.
If you just have the standard lens which came with your DSLR camera, often known as the "kit lens", then your average kit lens usually goes down to as low as f3.5, and something as high as f22.
f3.5 would allow you to blur out backgrounds as much as the example picture used in this article. If you want to achieve pictures with even more of a blurred out background, then you'll need to swap to a lens which offers a lower f number (eg f1.8, f2 etc). Having a lens which goes to a low f number, and offers a lot of zoom can either be very expensive, or compromise on quality, so you may wish to go for a lens which doesn't offer a huge range of zoom but is good quality and has ability to use a very low f number (large aperture). Your local camera shop should be able to advise you.
Also, let's say you have a lens which goes down to f3.5. Often you'll find it will only do f3.5 when zoomed out, and if you zoom in then you'll only be able to go down to say f5. So with your standard kit lens, be mindful of loosing the ability to use a large aperture (low f number) by zooming in too much.
Below you'll see a side by side example of exactly the same shot taken in aperture priority mode on a Canon 60D. The shot on the left was taken using a low f number, and the shot on the right was taken using a high f number. Everything else was set to completely automatic.
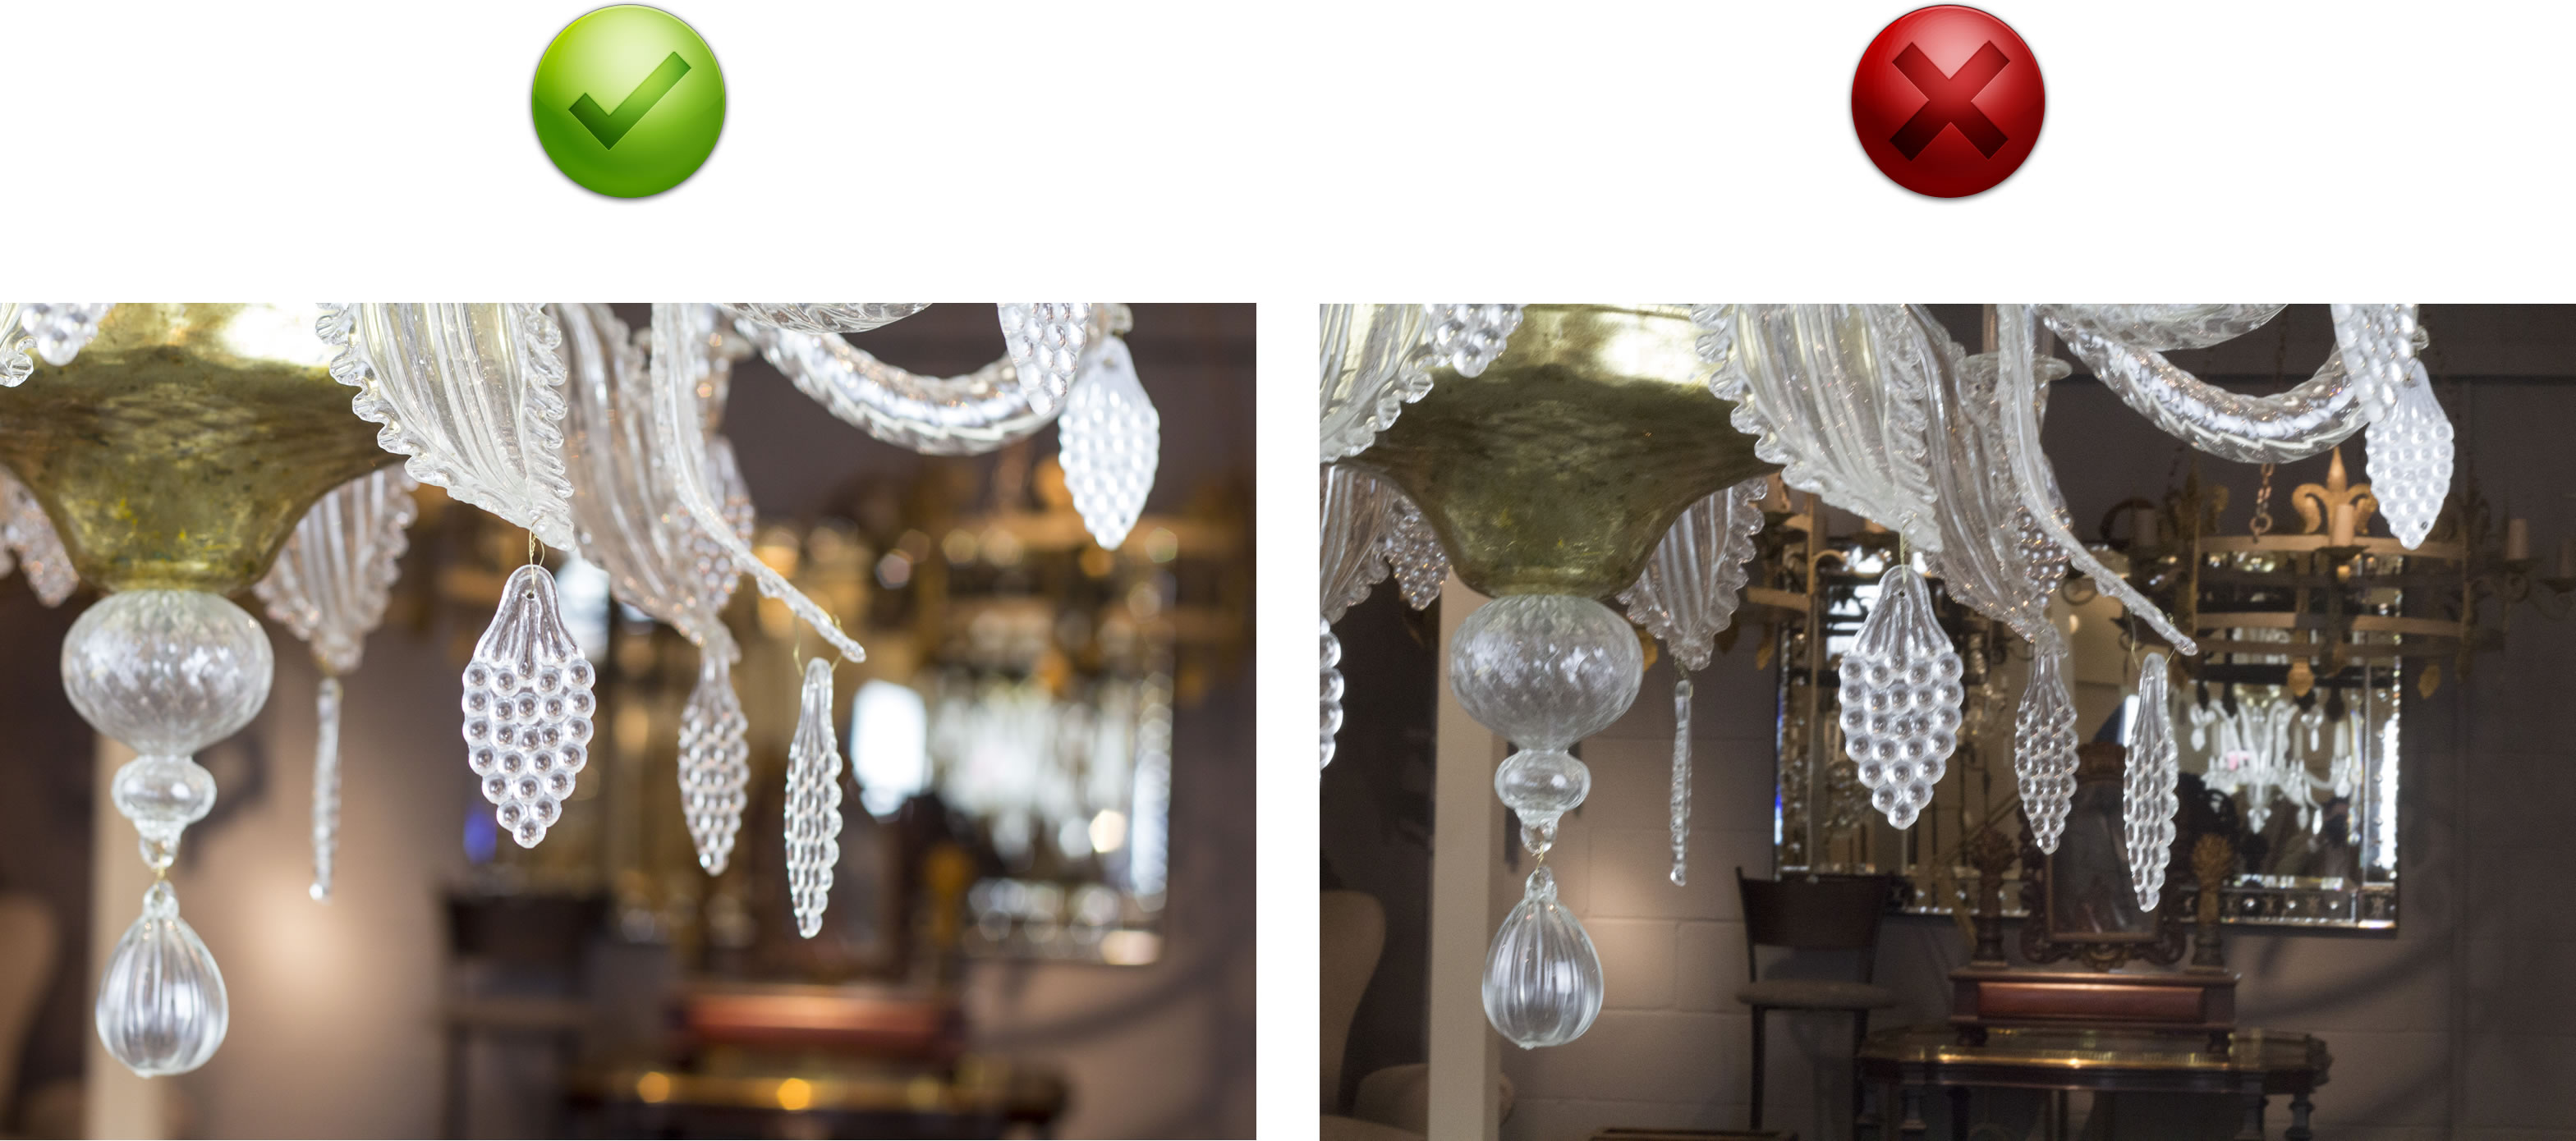
Here we used an aperture of f3.5. This resulted in:-
In this example, as we used a lower aperture the shutter on the camera didn't need to be open for as long. The shutter speed here was 1/60 (automatically worked out by the camera) and the quicker shutter speed also means there's less margin for error when it comes to camera shake or blurriness that would naturally occur if you're holding the camera yourself rather than using a tripod.

In this example we've used a very high f number; f22. Using this high an f number is probably a little over the top, but communicates the point perfectly. In the example photo below you can see:-

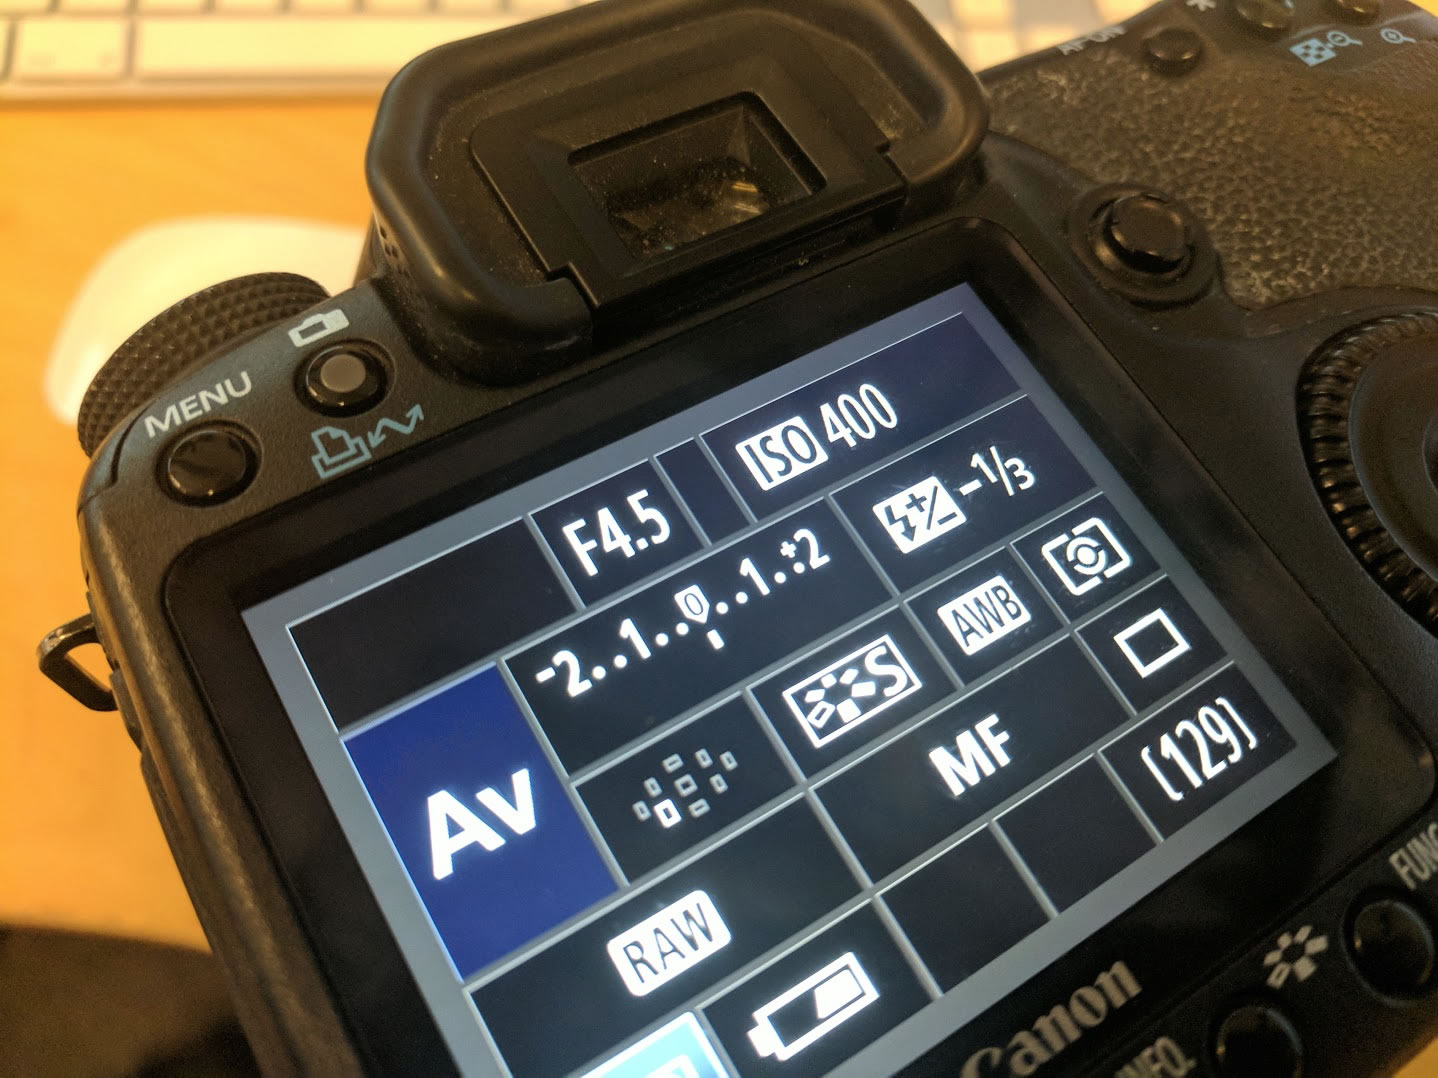
Canon DSLR Cameras - Set the dial to "Av"
Nikon DSLR Cameras - Set the dial to "A"
Sony DSLR Cameras - Set the dial to "A"
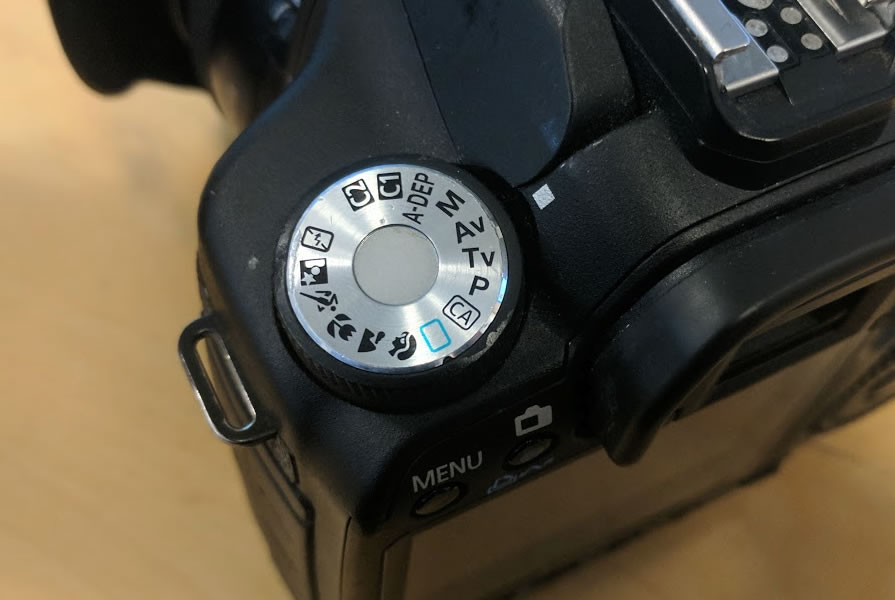
One you're in aperture priority mode (or just known as aperture mode), then you'll be able to control the aperture.
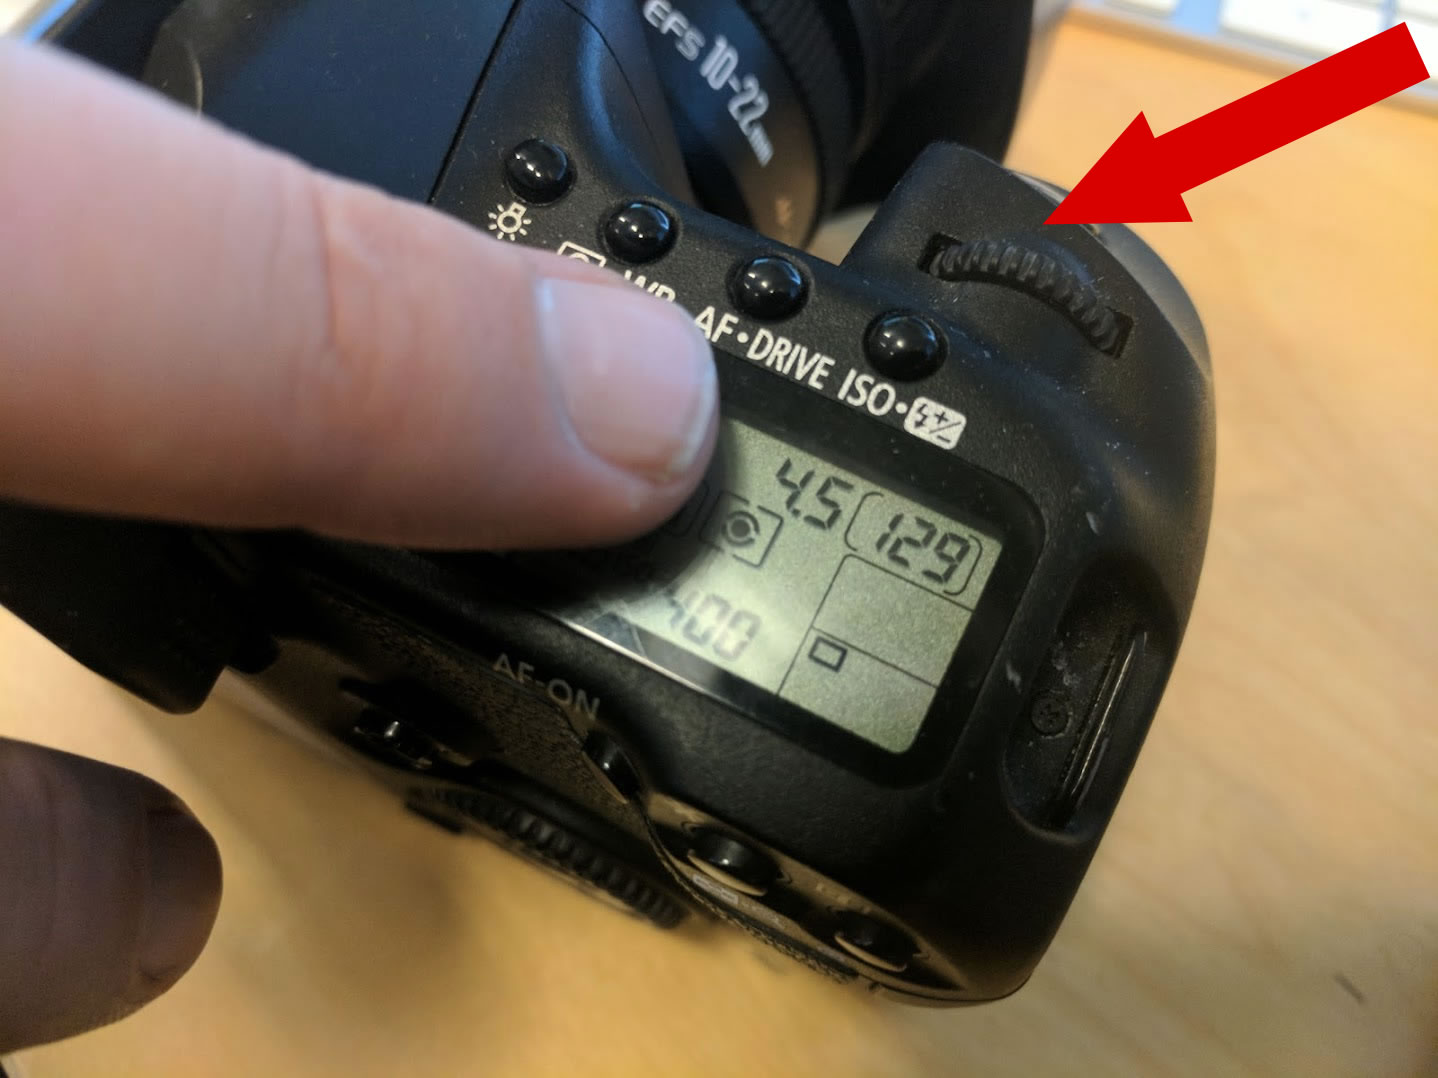
How to control the aperture varies depending on which make and model camera you're using. Usually there is a rotary wheel on the right which allows you to control it, and the f number will show up on either the screen on the top of your camera, or behind. Some cameras allow you to control the aperture on the big screen on the back. If in doubt, check the manual for your camera.
The example below shown is on a Canon 60D.
We'll break down complexity into simplicity and show you how to take great photos of your items! Our courses cover:-
1) How to use aperture on a camera
2) Adjusting shutter speed: the simple way
3) ISO and making the most of light
4) Editing your photos using Adobe Photoshop Lightroom
5) And more!
Contact us to find out more or register your interest.
Follow the blog on our website and our Facebook for more product photography tips, website tips and advice on selling online easily.
If you don't yet have a website, contact us about how we can help you sell online easily.
We can help you sell online easily too!
We have been businesses sell online easily since 2004, and we can help you too.
If you need a new website for your business, contact us on...
Click here to contact us by email
or call us onAs well as a hand held service, all our customers receive a copy of our marketing tips book which gives you lots of tips and advice on this on how to succeed online.